September 2013:
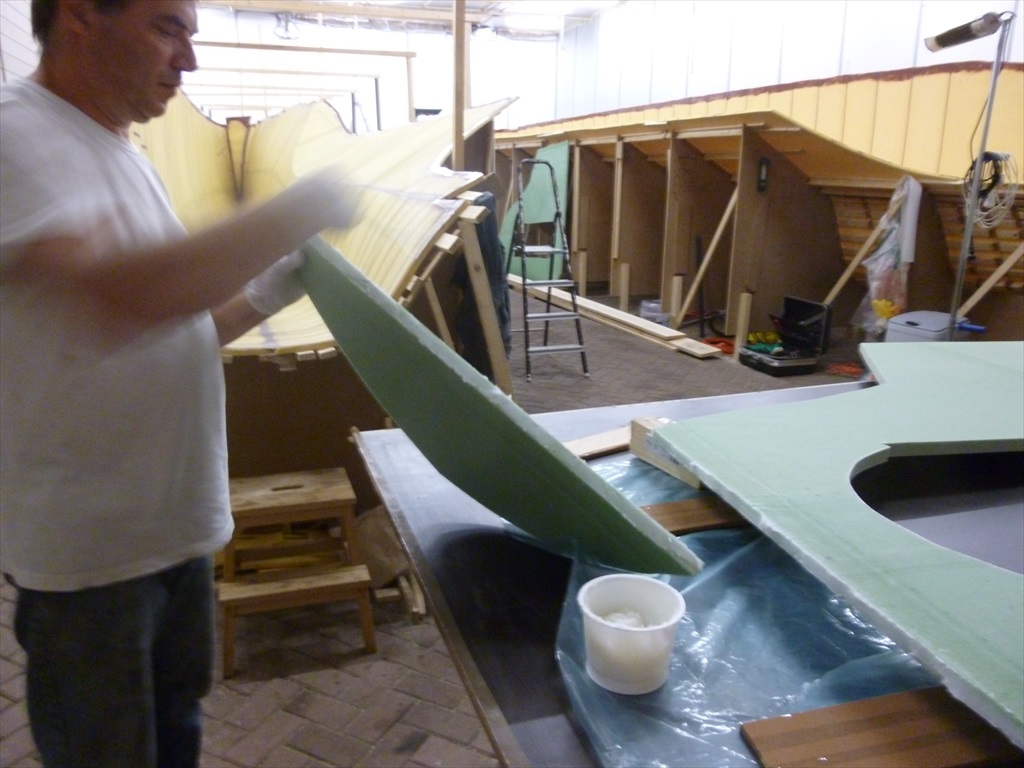
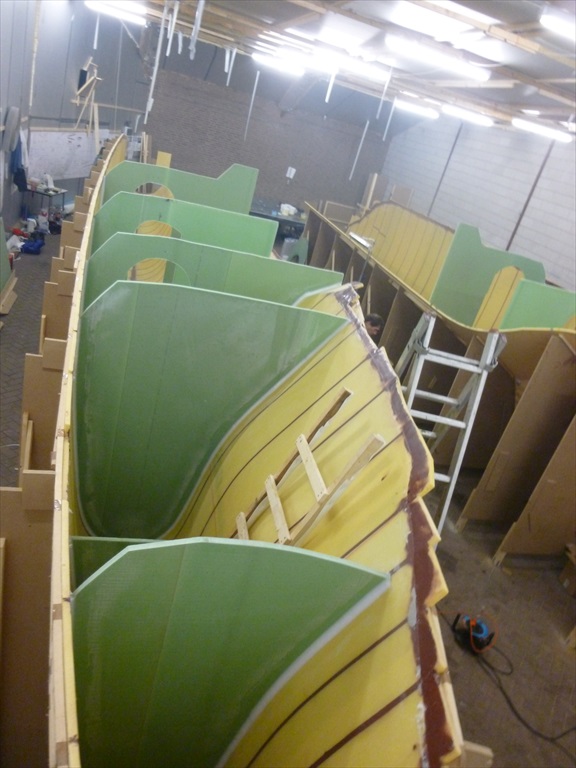
Now that the inside of the hull is laminated we can place the previously made bulkheads. This provides extra security on the inside when rotating the hull. On the outside of the hull fiberglass mats need to be added aswel in order to reach full strength and structural integrity.
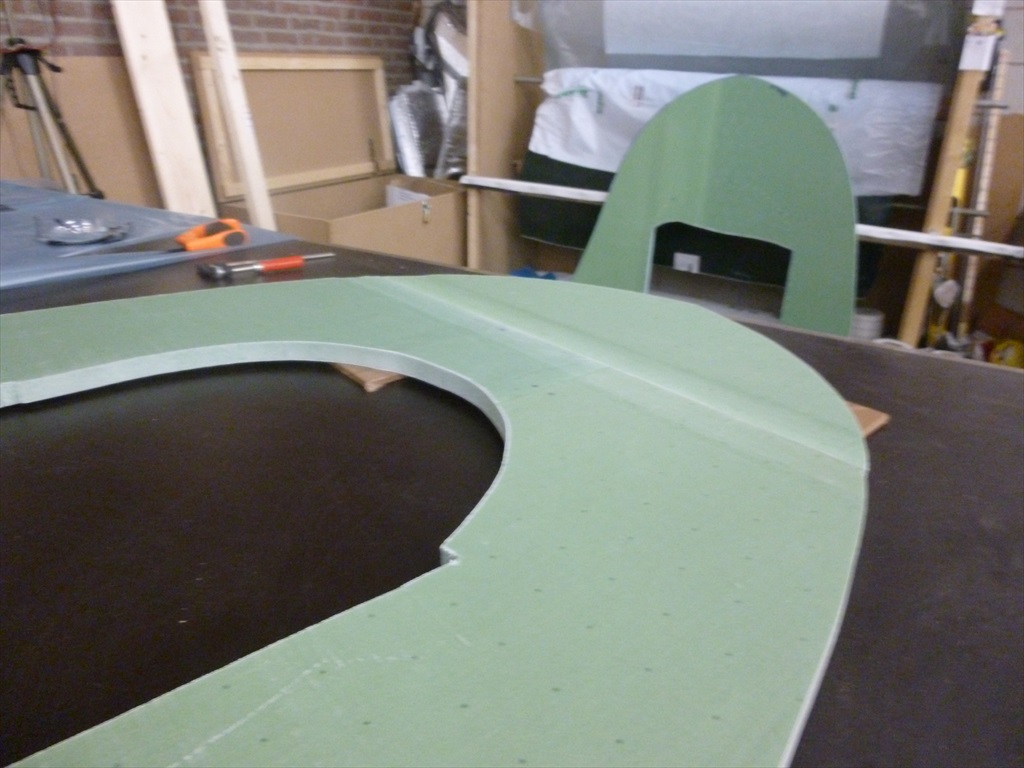
Some bulkheads became too big to saw out of one panel. The bulkheads made out of 2 panels are first being glued together. This is done by attaching the parts together and adding a mixture of epoxy and aerosil, place this mixture under pressure until it is fully hardened.
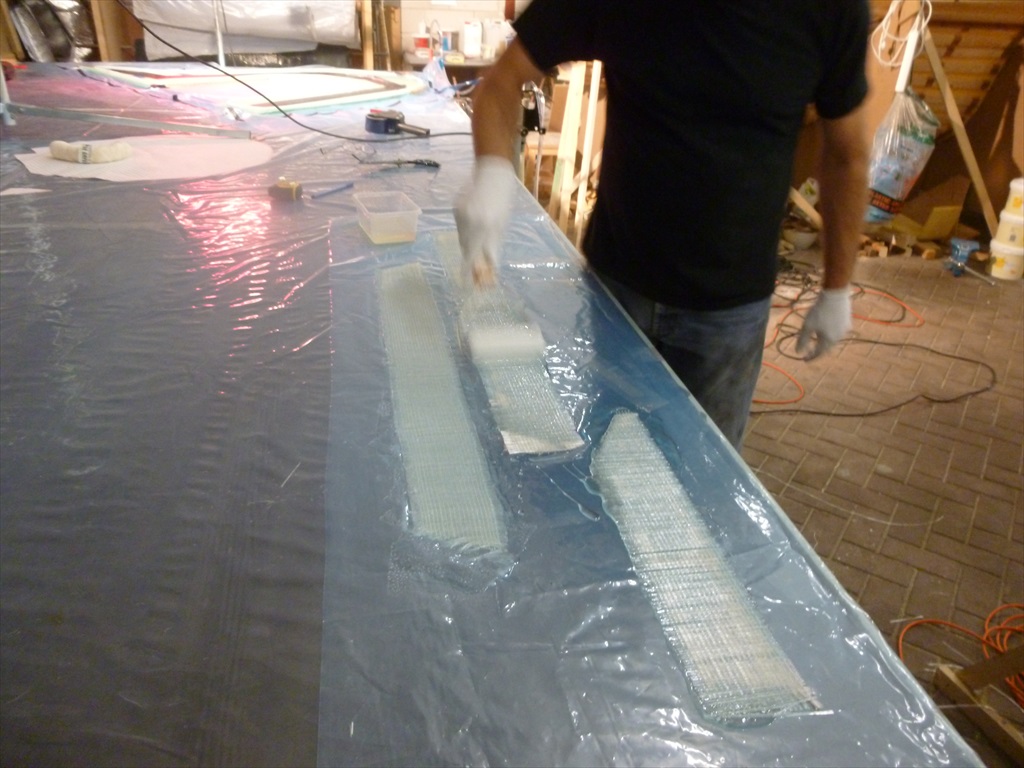
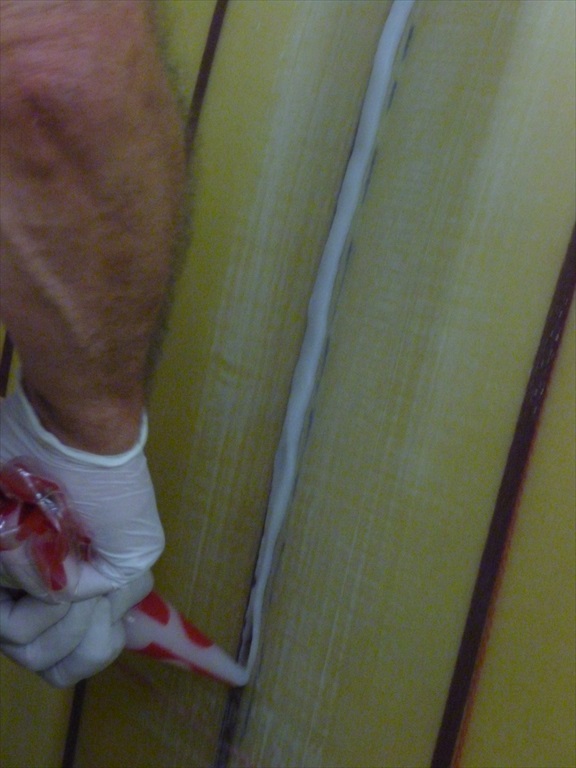
To realize the full sturdiness the glue strip will hold another strip of fiberglass mats with the exact same weight as the fiberglass mat on the truss. On a piece of plastic we will roll the strips first through the epoxy mix so that the strip is fully drenched. We leave them to dry for a bit and then apply on the seam. On top of that we will place a strip of peelpy; also drenched in epoxy. The peelply is removed after hardening, this leaves us with a nice and even surface. The piece of baking paper underneath the truss ensures that the truss does not stick to anything.

Aligning the bulkheads
The first truss is always the trickiest. In the beginning you lack a referencing framework. All resources are being tapped, Battens in the direction of the truss (we already marked the centreline and the waterline) and a long batten on top of the keel beam with a perpendicular line. After 15 minutes it is exactly the way we wanted.

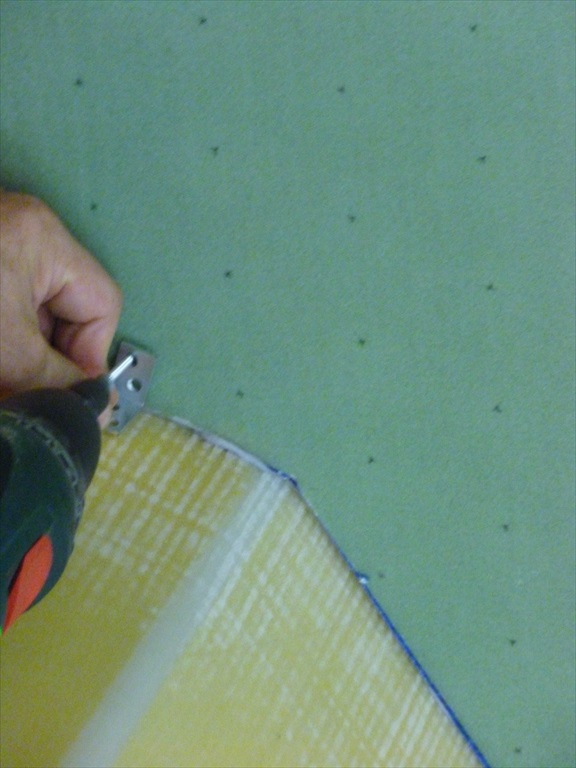
Now that we know how the bulkhead has to be placed we will place temporary small brackets on the hull. Then we can remove them to add glue on sanded part. The epoxy with aerosol is being placed in a candy bag (like the chefs in a restaurant do with whip cream) to add a nice even and broad strip of glue on the hull. After that we pressed the bulkhead firmly in the glue and we secured it with the small brackets. Leftover epoxy is removed before it is fully hardend. Naturally we checked the alignment again before the placement of the bulkhead.

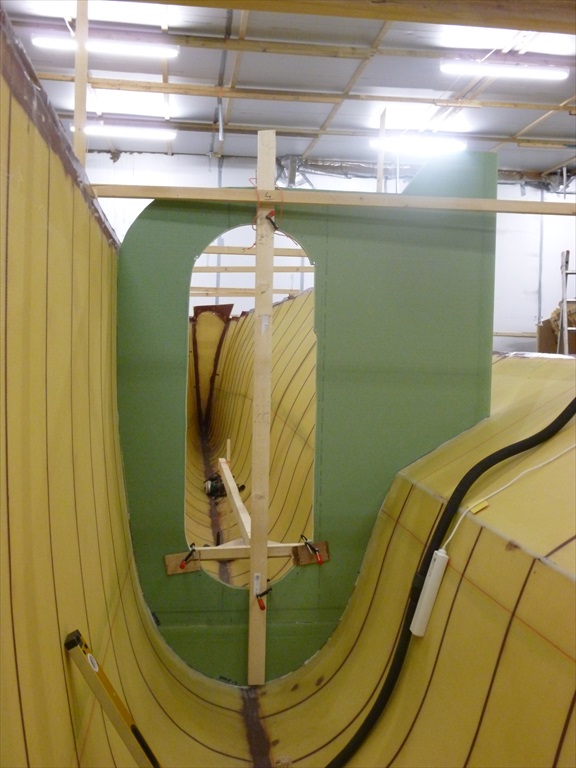
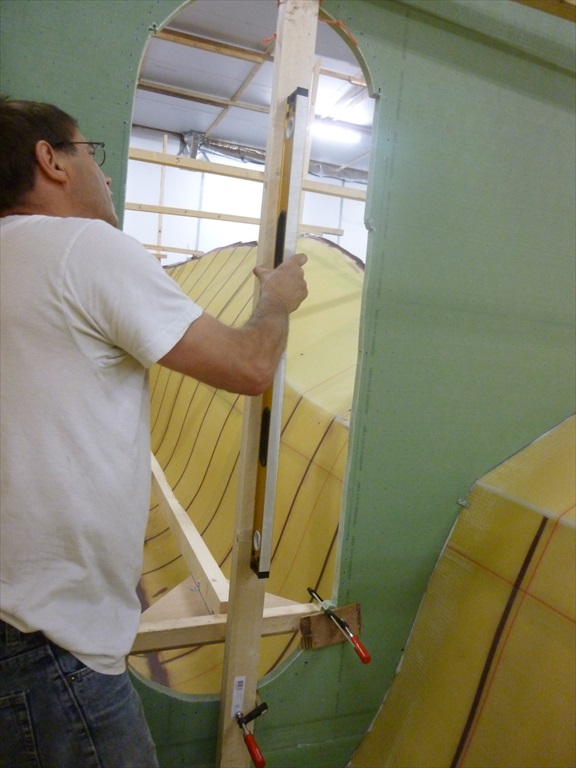
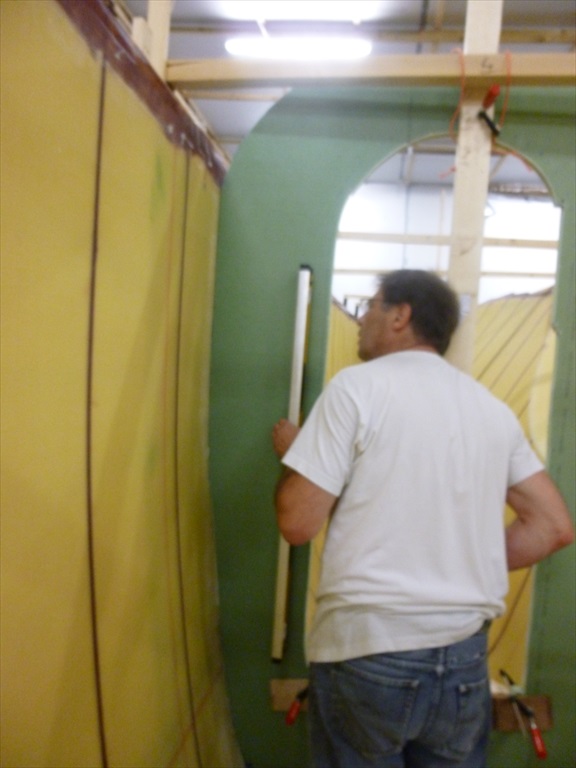
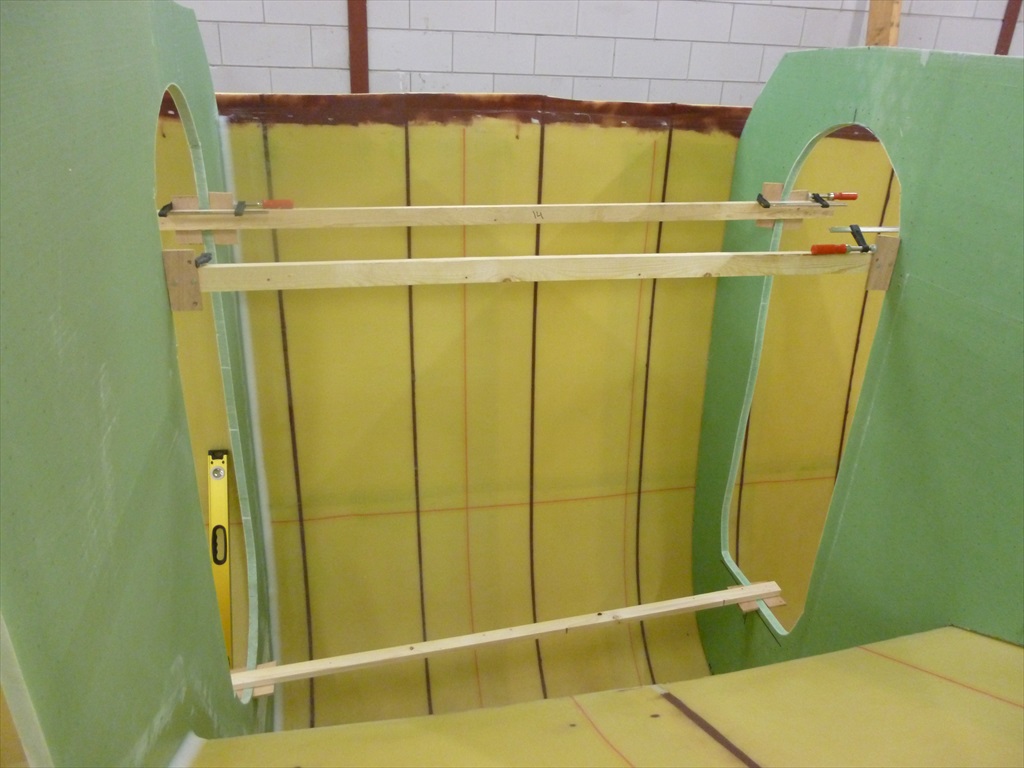
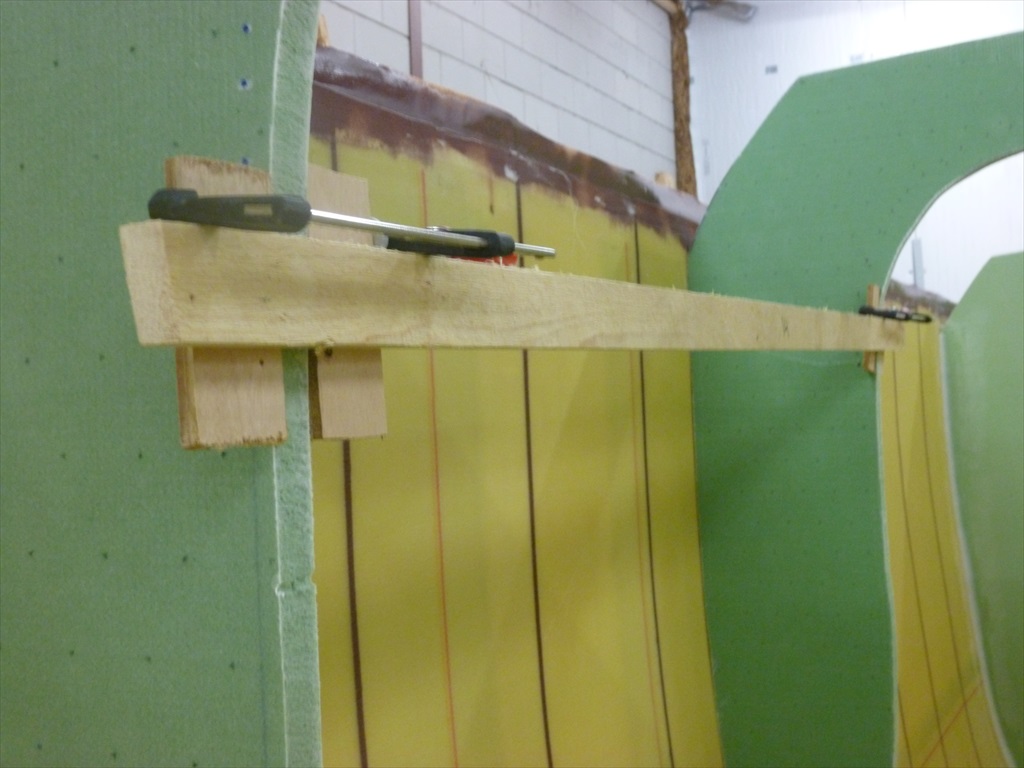
Bulkhead 5 was our benchmark. From there we measured the bulkhead from front to back. To measure the distance between bulkhead 6 and 4 we made 3 identical wooden beams. These wooden beams were secured in the doorway. This served an additional purpose as the alignment was made more easy.
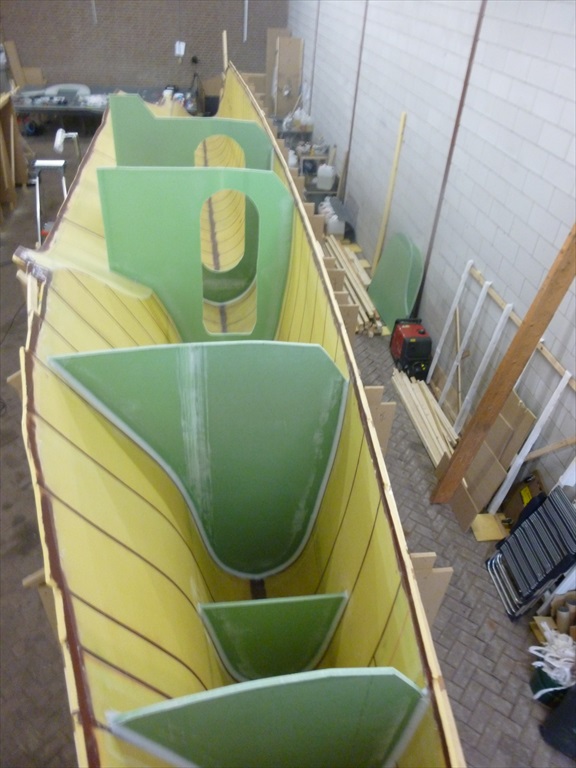
Fillets in the seams
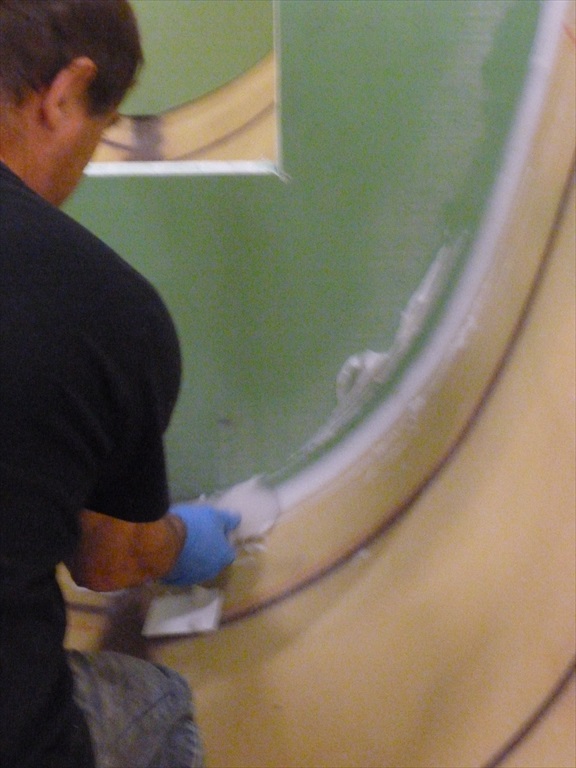
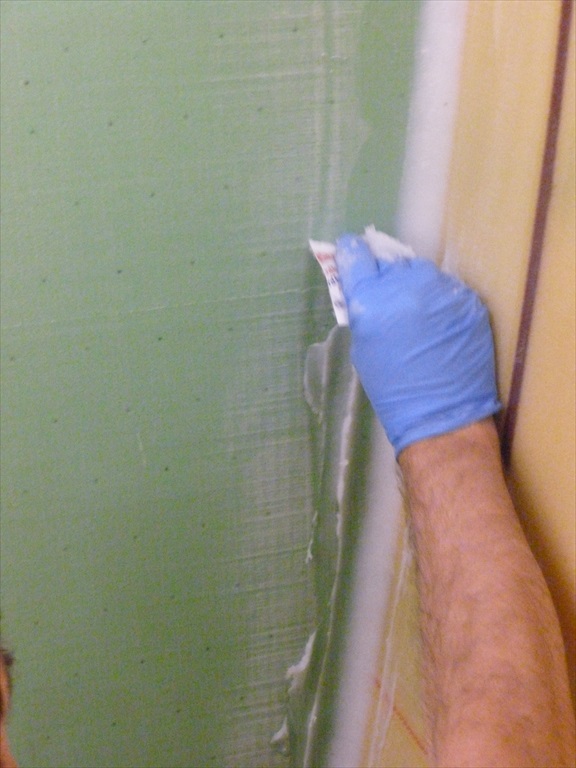
Now that the bulkheads are in place they will receive on both ends a fillet with a radius of 25 mm. Again we made an additional aid that ensured an easy applying process for the filet. An old piece of lexaan from the previous build was used here. Firm enough, easy to shape with the jig saw and the eccentric sander and after use, easily cleaned.
First we apply a layer of epoxy mixed with aerosol and cotton, with a formed spatula we made a nice smooth filet and the residue epoxy was immediately removed so we could keep a smooth surface. Later we will place additional strips of fiberglass mats for maximum strength.

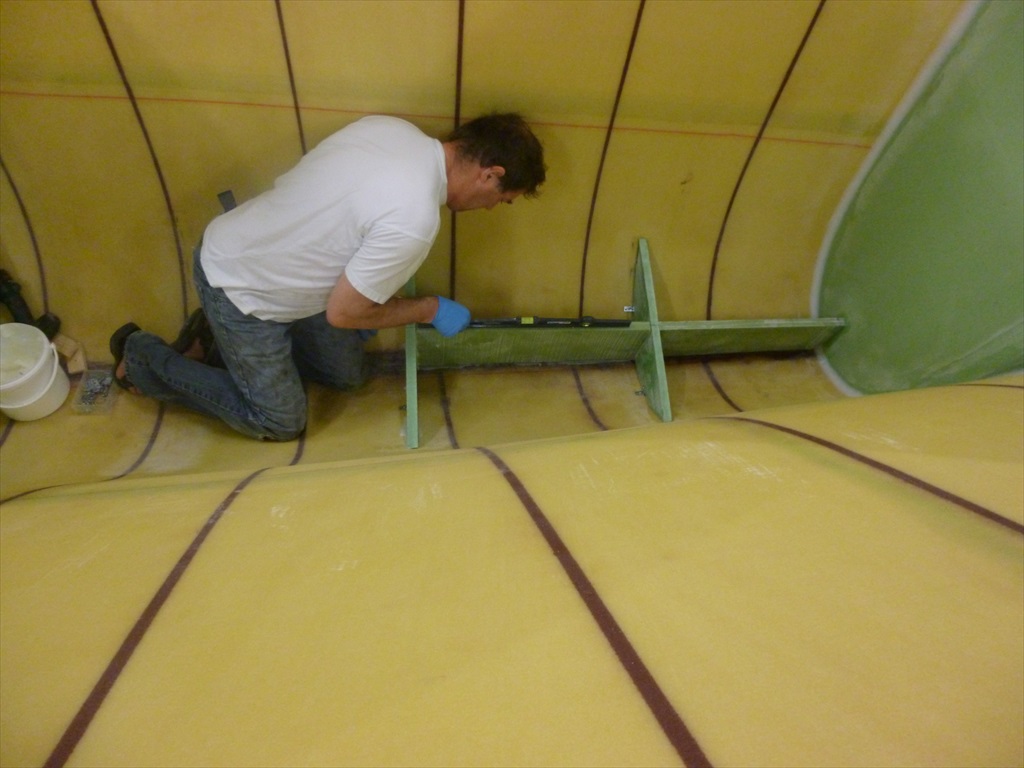
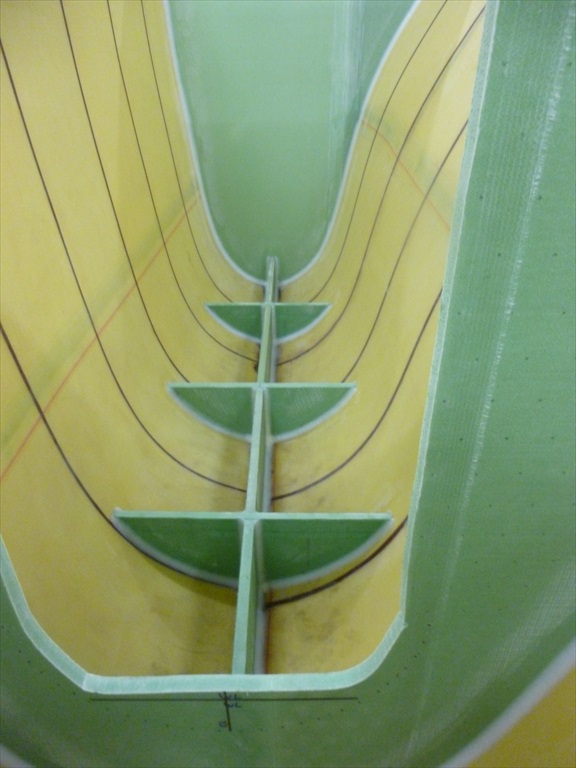
Underfloor web
After the bulkheads the web underneath the floor up for treatment. Working this way leaves us with even additional strength for the turning of the hull. Because they are allot smaller it is much easier to align and glue. Laying fillets is harder because you need to put your feet somewhere while working (preferably not in a fresh and nice epoxy seamJ )On these parts the floor will be placed, in the end you will stand around 20 centimetre underneath the waterline.
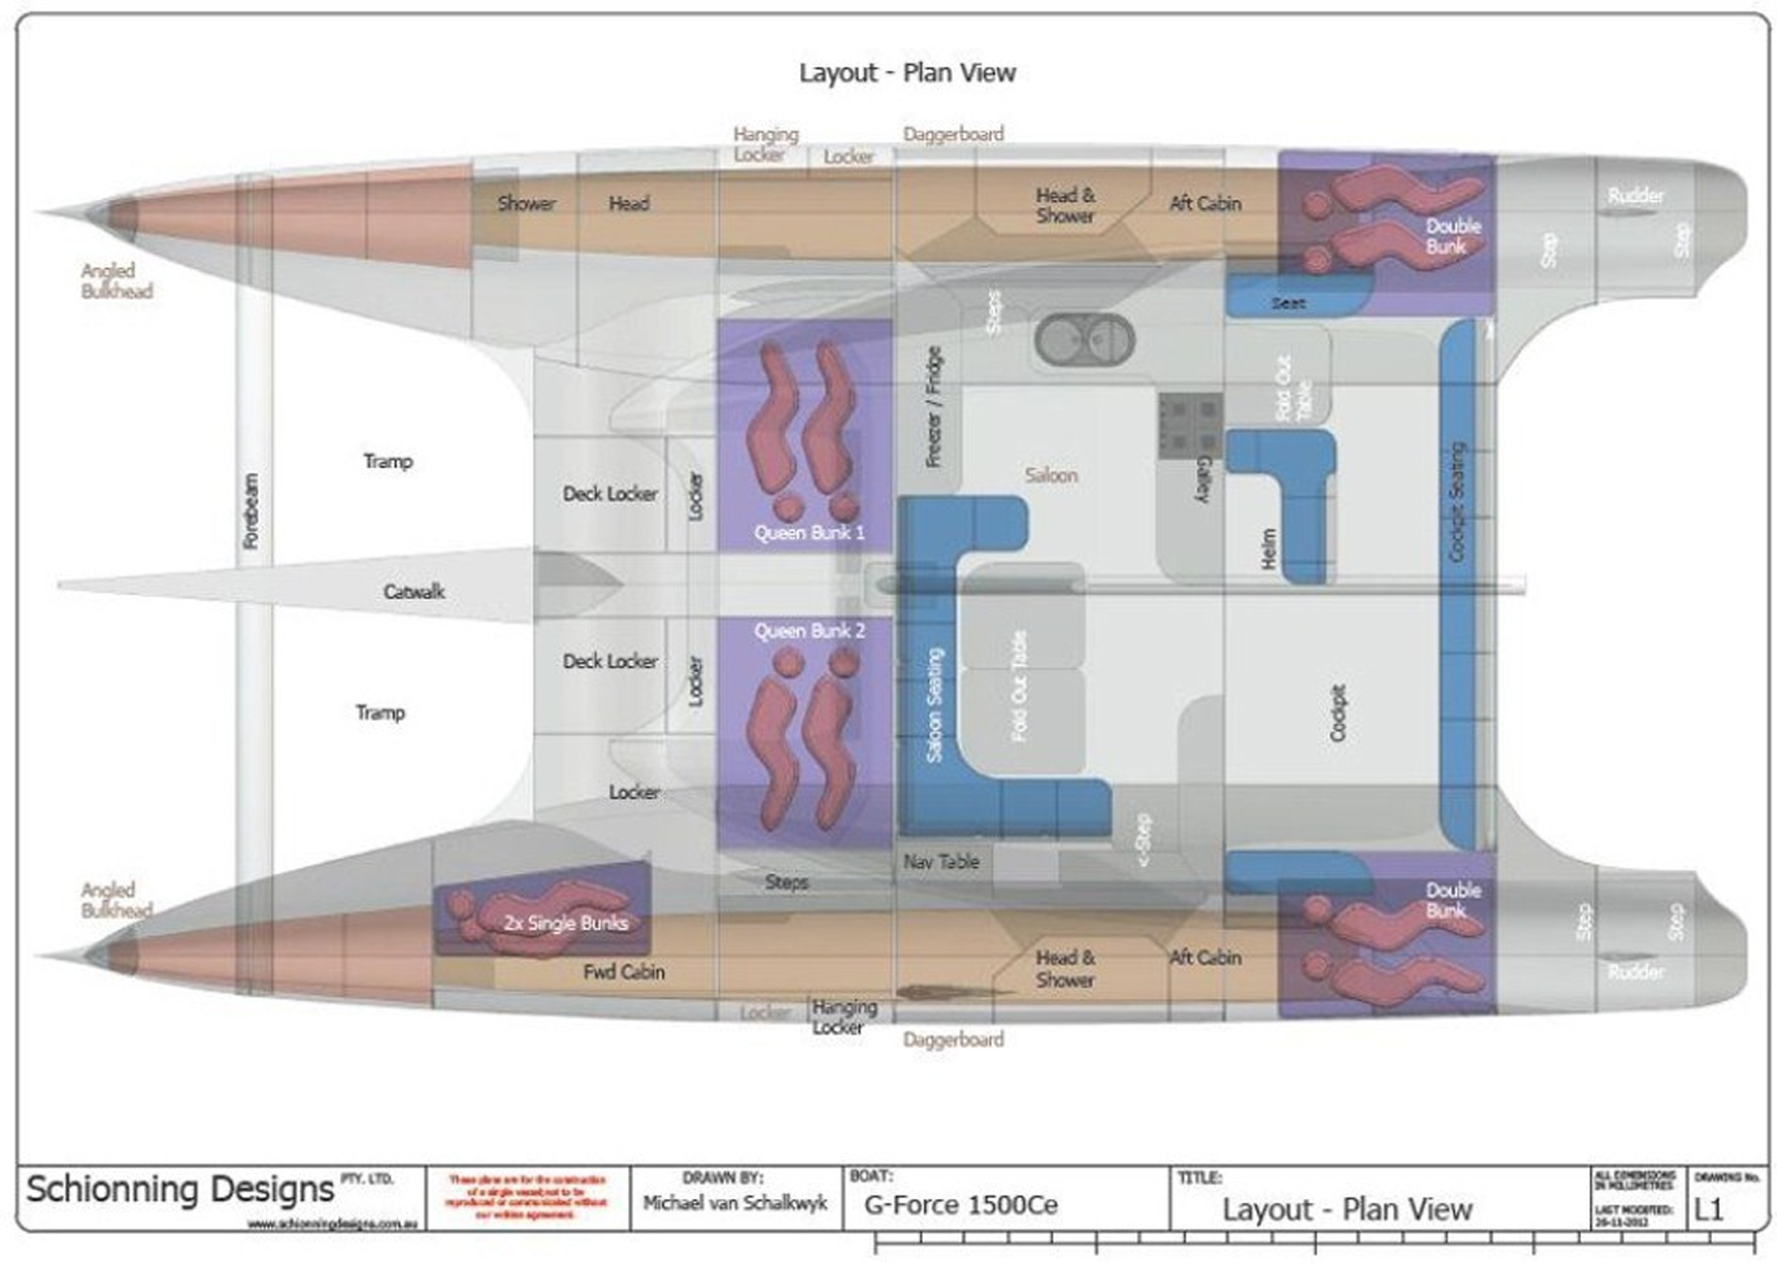
It is starting to get its form. Left: one truss more. Here will be our shower/washing and toilet cabin. Right: (closed truss) here will be a cabin with a bunk bed.
Above you see the view from the front till the back. The first truss wil become the entrance to the sleeping cabines. The hulls will be 2 meters apart. Above the chamfer (the sloping side in the middle path) there will be the bridge with salon and cockpit.
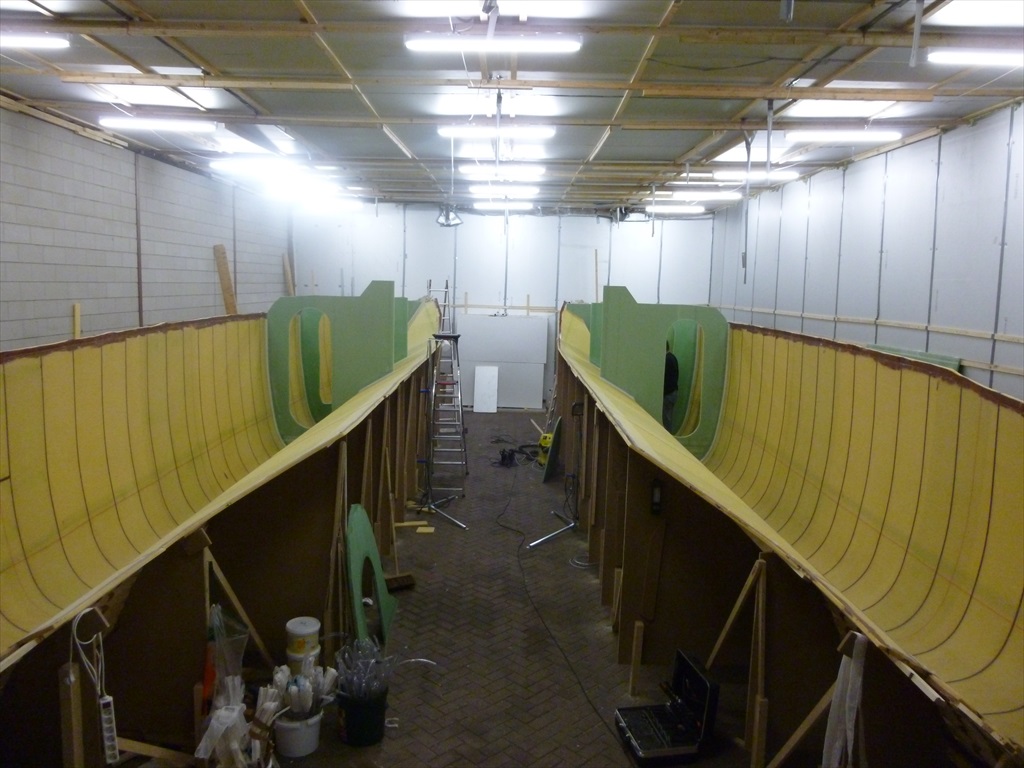
Perhaps these images help shape your imagination: